How to Draw Animals Like a Pro: A Comprehensive Guide
Drawing animals is not easy for new learners but it is not impossible! Learning how to draw animals took me a while until I reached my expertise. I’ll guide you based on my experience through the essential tools, warm-up exercises, and techniques to help you sketch like a pro. This guide covers everything from choosing the right pencils to mastering shading. Ready to find out your inner sketching artist?

Tutorials to learn how to draw animals
Before learning how to sketch, I highly recommend to watch my sketching tutorials with different sketching examples. Once you build confidence in planning and drawing techniques that help to visualize every detail of the sketch, feel free to begin practicing.
How to Draw a Dog | Golden Lab Puppy
Would you like to know how to draw a sketch of a Golden Lab puppy? You’re in the right place! In under 30 minutes, this guide will transform you from a novice to a confident artist. We’ll break down the process into simple, manageable steps, perfect for kids and...
How to Draw a Wolf for Beginners
Would you like to know how to draw a sketch of a wolf? You’re in the right place! In under 30 minutes, this guide will transform you from a novice to a confident artist. We’ll break down the process into simple, manageable steps, perfect for kids and beginners. You’ll...
How to Draw a Lion Sketch
Would you like to know how to draw a lion sketch? You're in the right place! In under 30 minutes, this guide will transform you from a novice to a confident artist. We'll break down the process into simple, manageable steps, perfect for kids and beginners. You'll...
What tools do I need to start sketching?
To start sketching, it’s important to have the right tools. The first step is understanding the types and grades of pencils. Pencils come in various grades such as HB, 2B, and 4B. HB pencils are medium-hard and suitable for general sketching, while 2B pencils are softer and create darker lines. For shading, 4B pencils are ideal due to their softness and darker tone. Beginners should start with HB and 2B pencils for a good balance between hardness and darkness.
Erasers are another essential tool. There are two main types: kneaded erasers and vinyl erasers. Kneaded erasers are soft, pliable, and can be shaped, making them great for lightening areas without completely removing the graphite. Vinyl erasers are firmer and more effective at removing graphite completely, perfect for correcting mistakes.
Choosing the right paper is also crucial. You can use sketchbooks for convenience or loose sheets if you prefer working on single pages. Sketchbooks help keep all your work in one place, while loose sheets offer flexibility. The key is to select a type of paper that suits your style and preference.
Warm-Up Exercises for Sketching
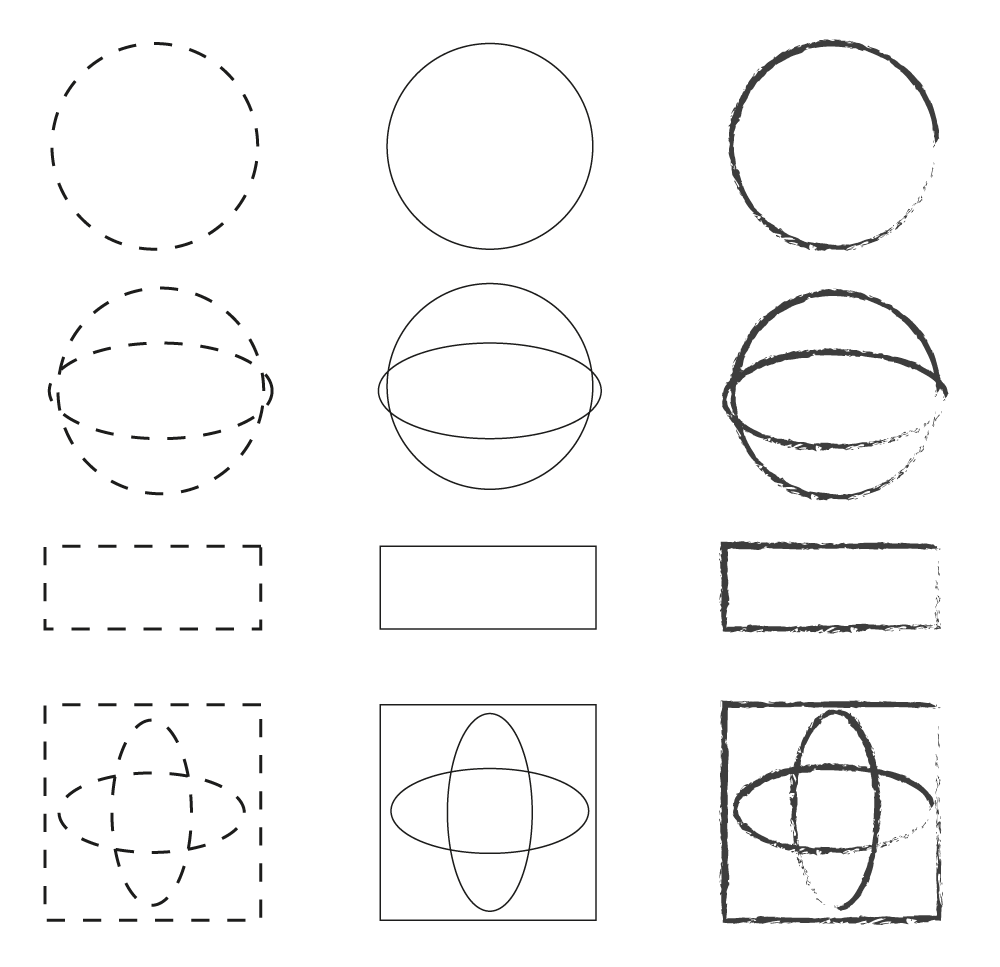
To improve hand-eye coordination, start with simple exercises. Begin by practicing drawing straight and curved lines. Use a ruler for straight lines initially, then try drawing freehand lines without the ruler. Progress to drawing circles and ellipses of varying sizes, which will help you control your pencil better.
Exploring different mark-making techniques can also enhance your skills. Start with scribbles, which are random lines that fill a space and help loosen up your hand. Move on to doodles, which are small, simple drawings of shapes or tiny scenes. Finally, practice hatching by drawing parallel lines close together to add texture and shading to your sketches. Combine these exercises into a solid warm-up routine, and you’ll notice improvement in your sketches over time.
Breaking Down Objects into Basic Shapes
How do you begin sketching complex objects? When sketching complex objects, start by identifying the basic shapes within them. Look for circles, rectangles, and triangles in the object you want to draw. Simplifying the object into these shapes makes it easier to sketch.
Create an underdrawing with light, loose lines to outline these basic shapes. This step sets the foundation for your sketch, allowing you to adjust proportions and structure without committing to heavy marks. Ensure the sizes of the shapes are accurate in relation to each other to maintain balance and realism. This method, a core technique in many drawing tutorials and art classes, helps you see and draw the world in a simpler, more manageable way.

Refining Your Drawing
How do I make my sketches look more polished? To polish your sketches, start by transitioning from light lines to solid outlines. Use light lines for your initial sketch to adjust proportions and structure easily. Once you’re satisfied, go over the lines with a firmer hand using an HB or 2B pencil. This defines the form and makes your drawing stand out.
Pay attention to angles and edges, observing how lines intersect and where curves change direction. Breaking down complex forms into simpler lines and angles helps capture the essence of your subject more accurately. Practicing quick sketches can also improve fluidity and confidence in your drawing. Set a timer for 1 to 5 minutes and draw your subject quickly, focusing on capturing the main shapes and lines without worrying about details. This exercise enhances hand-eye coordination and dynamic line work.
Adding Contrast and Details
How do I add depth and detail to my sketches? Adding shadows and highlights is key to creating depth. Shadows show where light does not reach, while highlights mark the brightest spots. Use a soft pencil, like a 4B, for dark areas, and an eraser to lift graphite for highlights. This contrast makes your sketches pop with three-dimensional realism.
Different shading techniques can also add detail. Circling involves small, circular motions to create smooth, even tones, great for soft transitions between light and dark. Hatching uses parallel lines to build up shadow, with cross-hatching adding another layer at an angle for more depth and texture. Stippling, which involves using tiny dots, allows precise control over texture and shading. Experiment with these techniques to see which works best for you and adds a unique touch to your art.

Advanced Sketching Techniques
What are some advanced sketching techniques I can learn? To advance your skills, learn perspective: one-point, two-point, and three-point. One-point perspective uses a single vanishing point on the horizon line, while the two-point perspective involves two vanishing points. Three-point perspective adds a third vanishing point, often used for drawing buildings viewed from above or below. These techniques help create depth and realism.
Understanding 3D volumes and forms is essential for realistic sketching. Start by sketching basic shapes like cubes, spheres, and cylinders, observing how light and shadow interact. Break down complex objects into these shapes to grasp their structure. This technique improves your overall drawing skills and helps you render complex objects more accurately.
To continue improving, explore various resources such as books like “Drawing on the Right Side of the Brain” and online courses. Practice consistently and use reference images to enhance your understanding and skills.


